Document Type Declaration
HTML files require certain elements to set up the document properly. We can let web browsers know that we are using HTML by starting our document with a document type declaration.
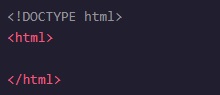
The declaration looks like this:

This declaration is an instruction, and it must be the first line of code in your HTML document.
It tells the browser what type of document to expect, along with what version of HTML is being used in the document.
The html tag
The DOCTYPE declaration provides the browser with two pieces of information (the type of document and the HTML version to expect), but it doesn’t actually add any HTML structure or content.
To create HTML structure and content, we must add opening and closing html tags after declaring :
Anything between the opening and closing html tags will be interpreted as HTML code.
Without these tags, it’s possible that browsers could incorrectly interpret your HTML code.
The Head
So far you’ve done two things to set up the file properly:
- Declared to the browser that your code is HTML with
- Added the HTML element (html) that will contain the rest of your code.
Remember the body tag? The head element is part of this HTML metaphor. It goes above our body element.
The (head) element contains the metadata for a web page.
Metadata is information about the page that isn’t displayed directly on the web page. The metadata in the head is information about the page itself.
The opening and closing head tags typically appear as the first item after your first HTML tag
Page Titles
A browser’s tab displays the title specified in the title tag. The title tag is always inside of the head.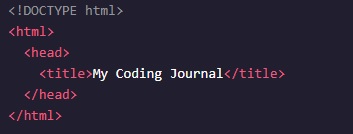
If we were to open a file containing the HTML code in the example above, the browser would display the words My Coding Journal in the title bar (or in the tab’s title).
Linking to Other Web Pages
One of the powerful aspects of HTML (and the Internet), is the ability to link to other web pages.
You can add links to a web page by adding an anchor element (a) and including the text of the link in between the opening and closing tags.

In the example above, the href (hyperlink reference) attribute has been set to the value of the URL https://www.wikipedia.org/
Opening Links in a New Window
The target attribute specifies how a link should open.
For a link to open in a new window, the target attribute requires a value of _blank. The target attribute can be added directly to the opening tag of the anchor element, just like the href attribute.
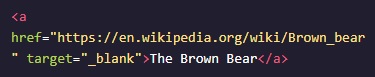
In the example above, setting the target attribute to "_blank" instructs the browser to open the relevant Wikipedia page in a new window.
Linking to Relative Page
Thus far you have learned how to link to external web pages. Many sites also link to internal web pages like Home, About, and Contact.
Before we learn how to link between internal pages, let’s establish where our files are stored.
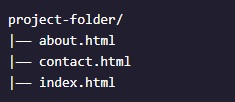
The example above shows three different files — about.html, contact.html, and index.html in one folder.
HTML files are often stored in the same folder, as shown in the example above. If the browser is currently displaying index.html, it also knows that about.html and contact.html are in the same folder. Because the files are stored in the same folder, we can link web pages together using a relative path.

In this example, the a tag is used with a relative path to link from the current HTML file to the contact.html file in the same folder. On the web page, Contact will appear as a link.
The ./ in ./contact.html tells the browser to look for the file in the current folder.
Linking to Same Page
How do we make it easier for a user to jump to different portions of our page?
When users visit our site, we want them to be able to click a link and have the page automatically scroll to a specific section.
In order to link to a target on the same page, we must give the target an id, like this:

In this example, the p element is assigned an id of “top” and the h1 element is assigned “bottom.”
An id can be added to most elements on a webpage.
An id should be descriptive to make it easier to remember the purpose of a link. The target link is a string containing the # character and the target element’s id.
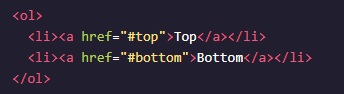
In the example above, the links to p id="top" and h1 id="bottom" are embedded in an ordered list. An id is especially helpful for organizing content belonging to a div!
Review
1. The (!DOCTYPE html) declaration should always be the first line of code in your HTML files. This lets the browser know what version of HTML to expect.
2. The (html) element will contain all of your HTML code.
3. Information about the web page, like the title, belongs within the (head) of the page.
4. You can add a title to your web page by using the (title) element, inside of the head.
5. A webpage’s title appears in a browser’s tab.
6. Anchor tags (a) are used to link to internal pages, external pages or content on the same page.
7. You can create sections on a webpage and jump to them using (a) tags and adding ids to the elements you wish to jump to.
8. Whitespace between HTML elements helps make code easier to read while not changing how elements appear in the browser.
9. Indentation also helps make code easier to read. It makes parent-child relationships visible.
The World Wide Web Consortium, or W3C, is responsible for maintaining the style standards of HTML.
10. Comments are written in HTML using the following syntax: (< !-- comment -->).
If you want to review how to use HTML in a project, watch the video below and follow along: